
How to fit a new headlining - Step by step instructions
Download or print these pictures for all the info you need
 |
 |
|
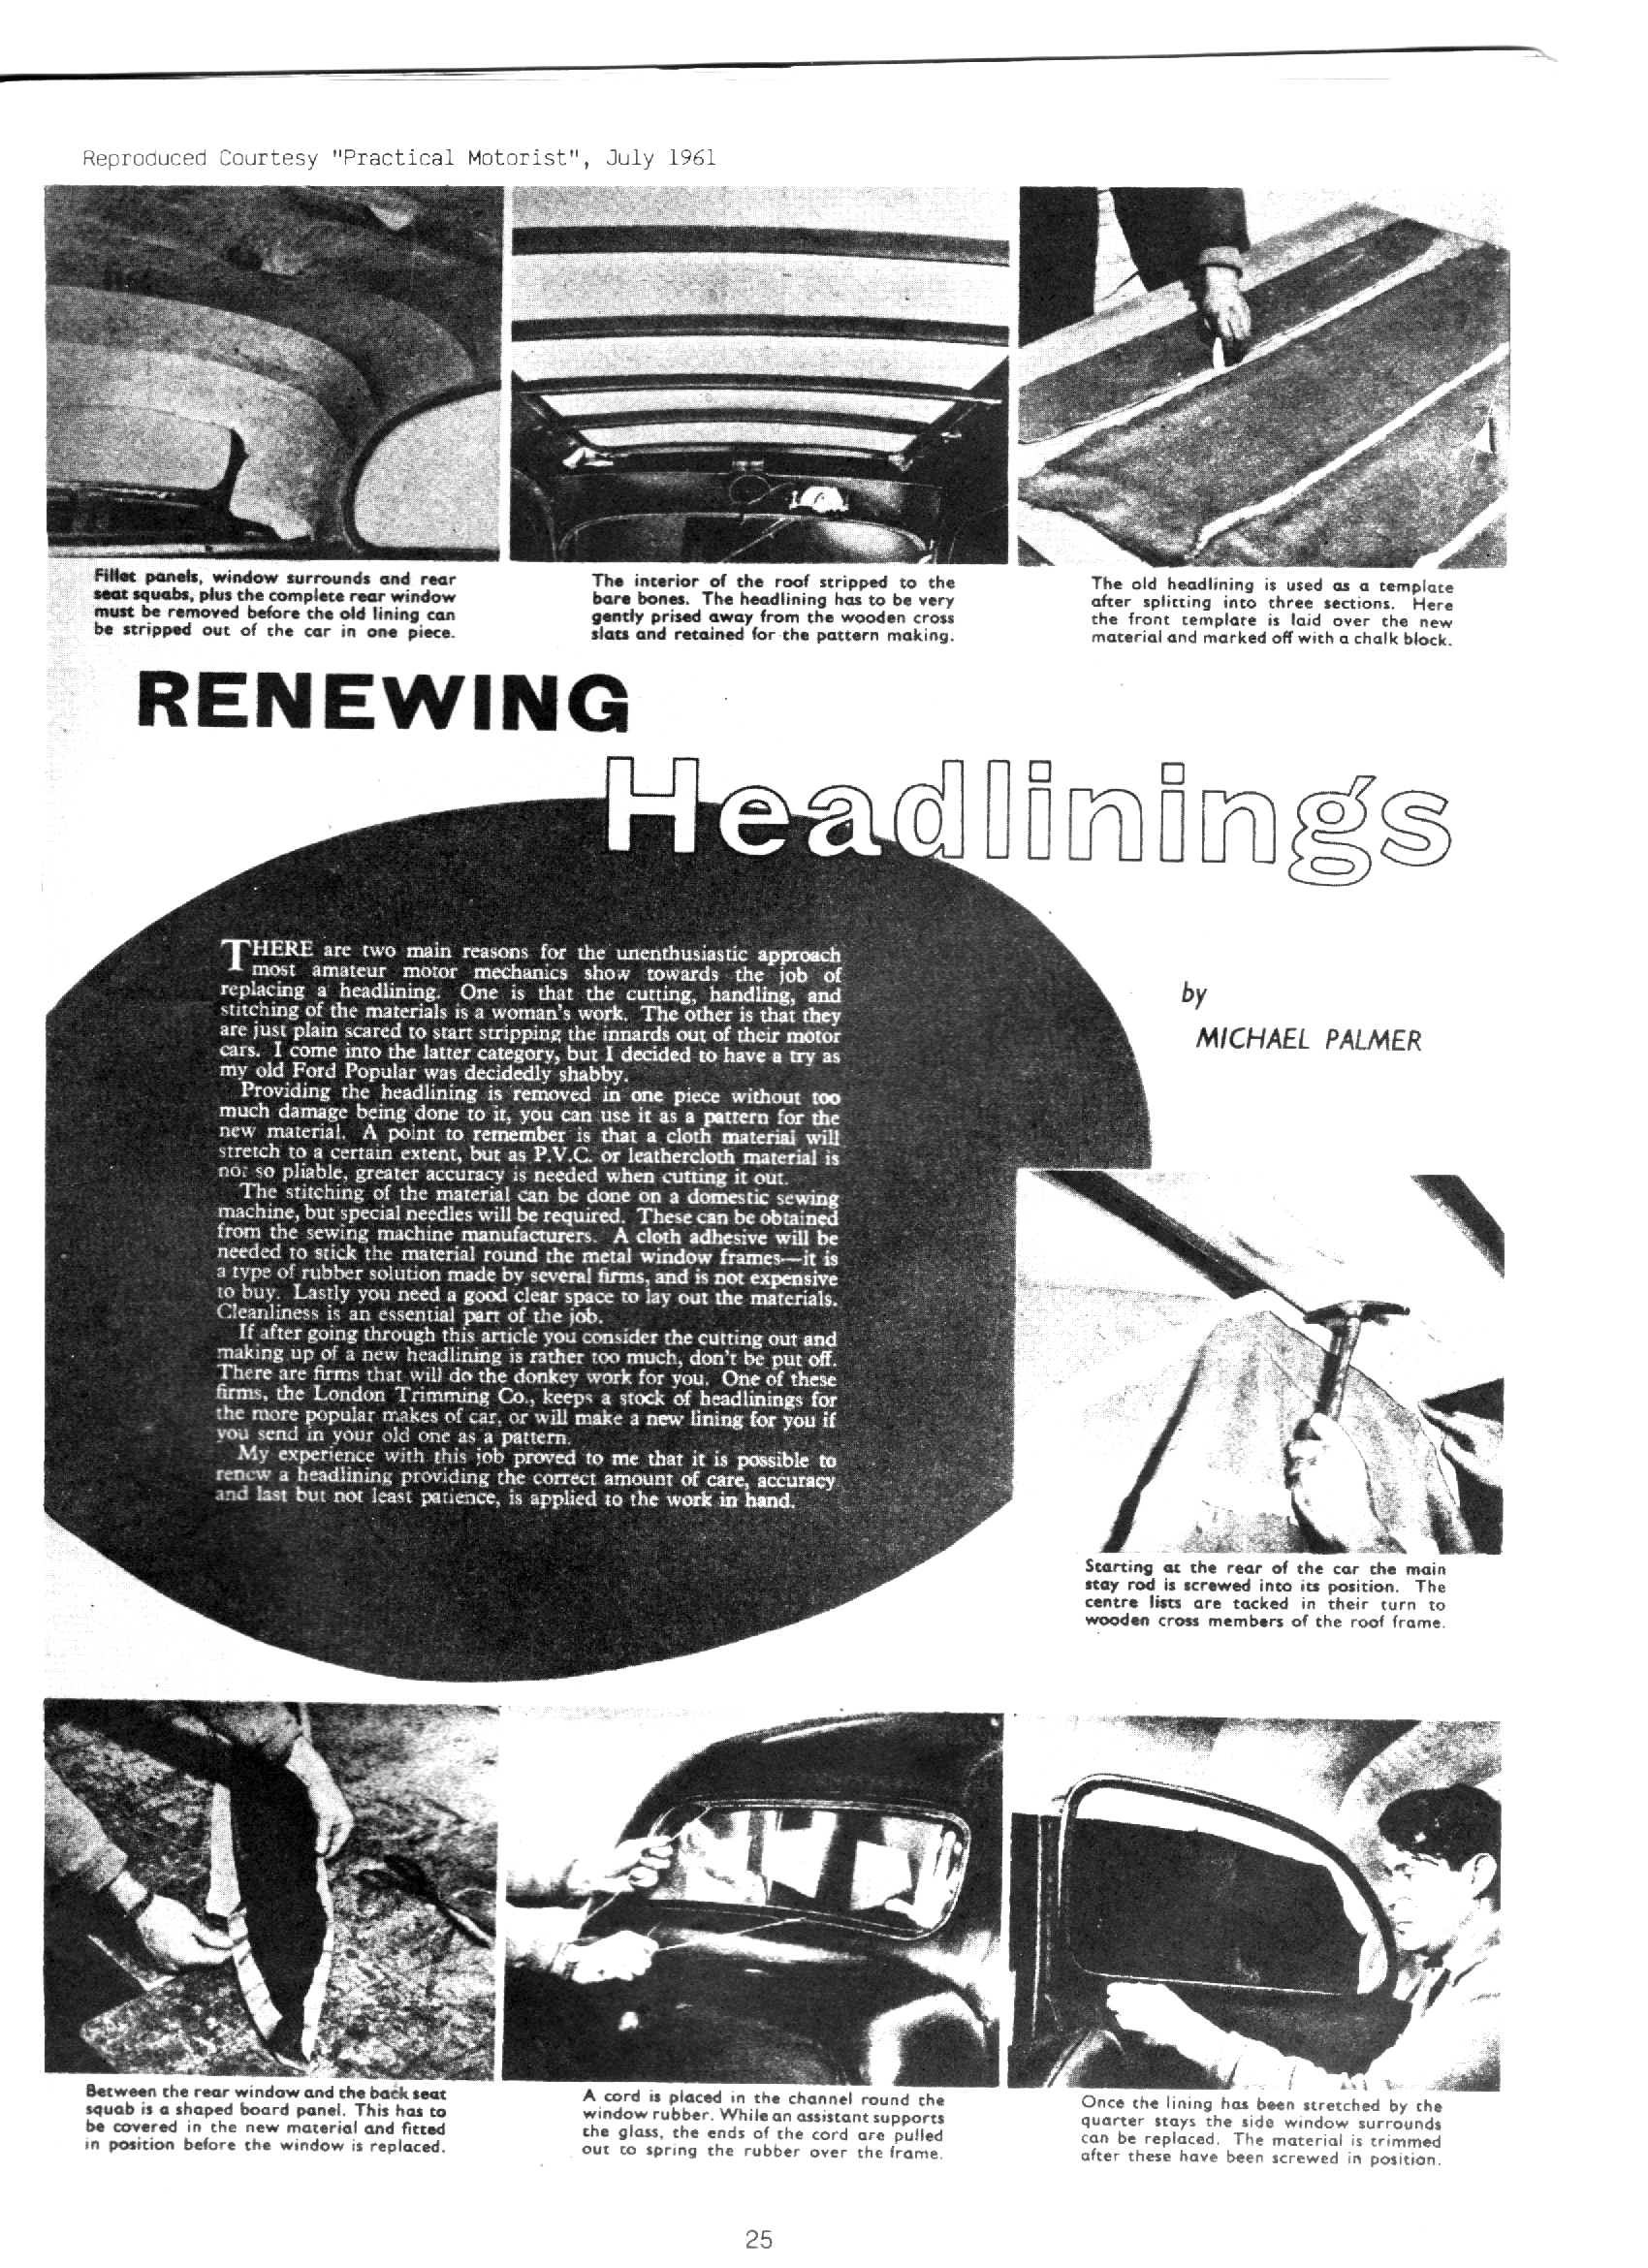
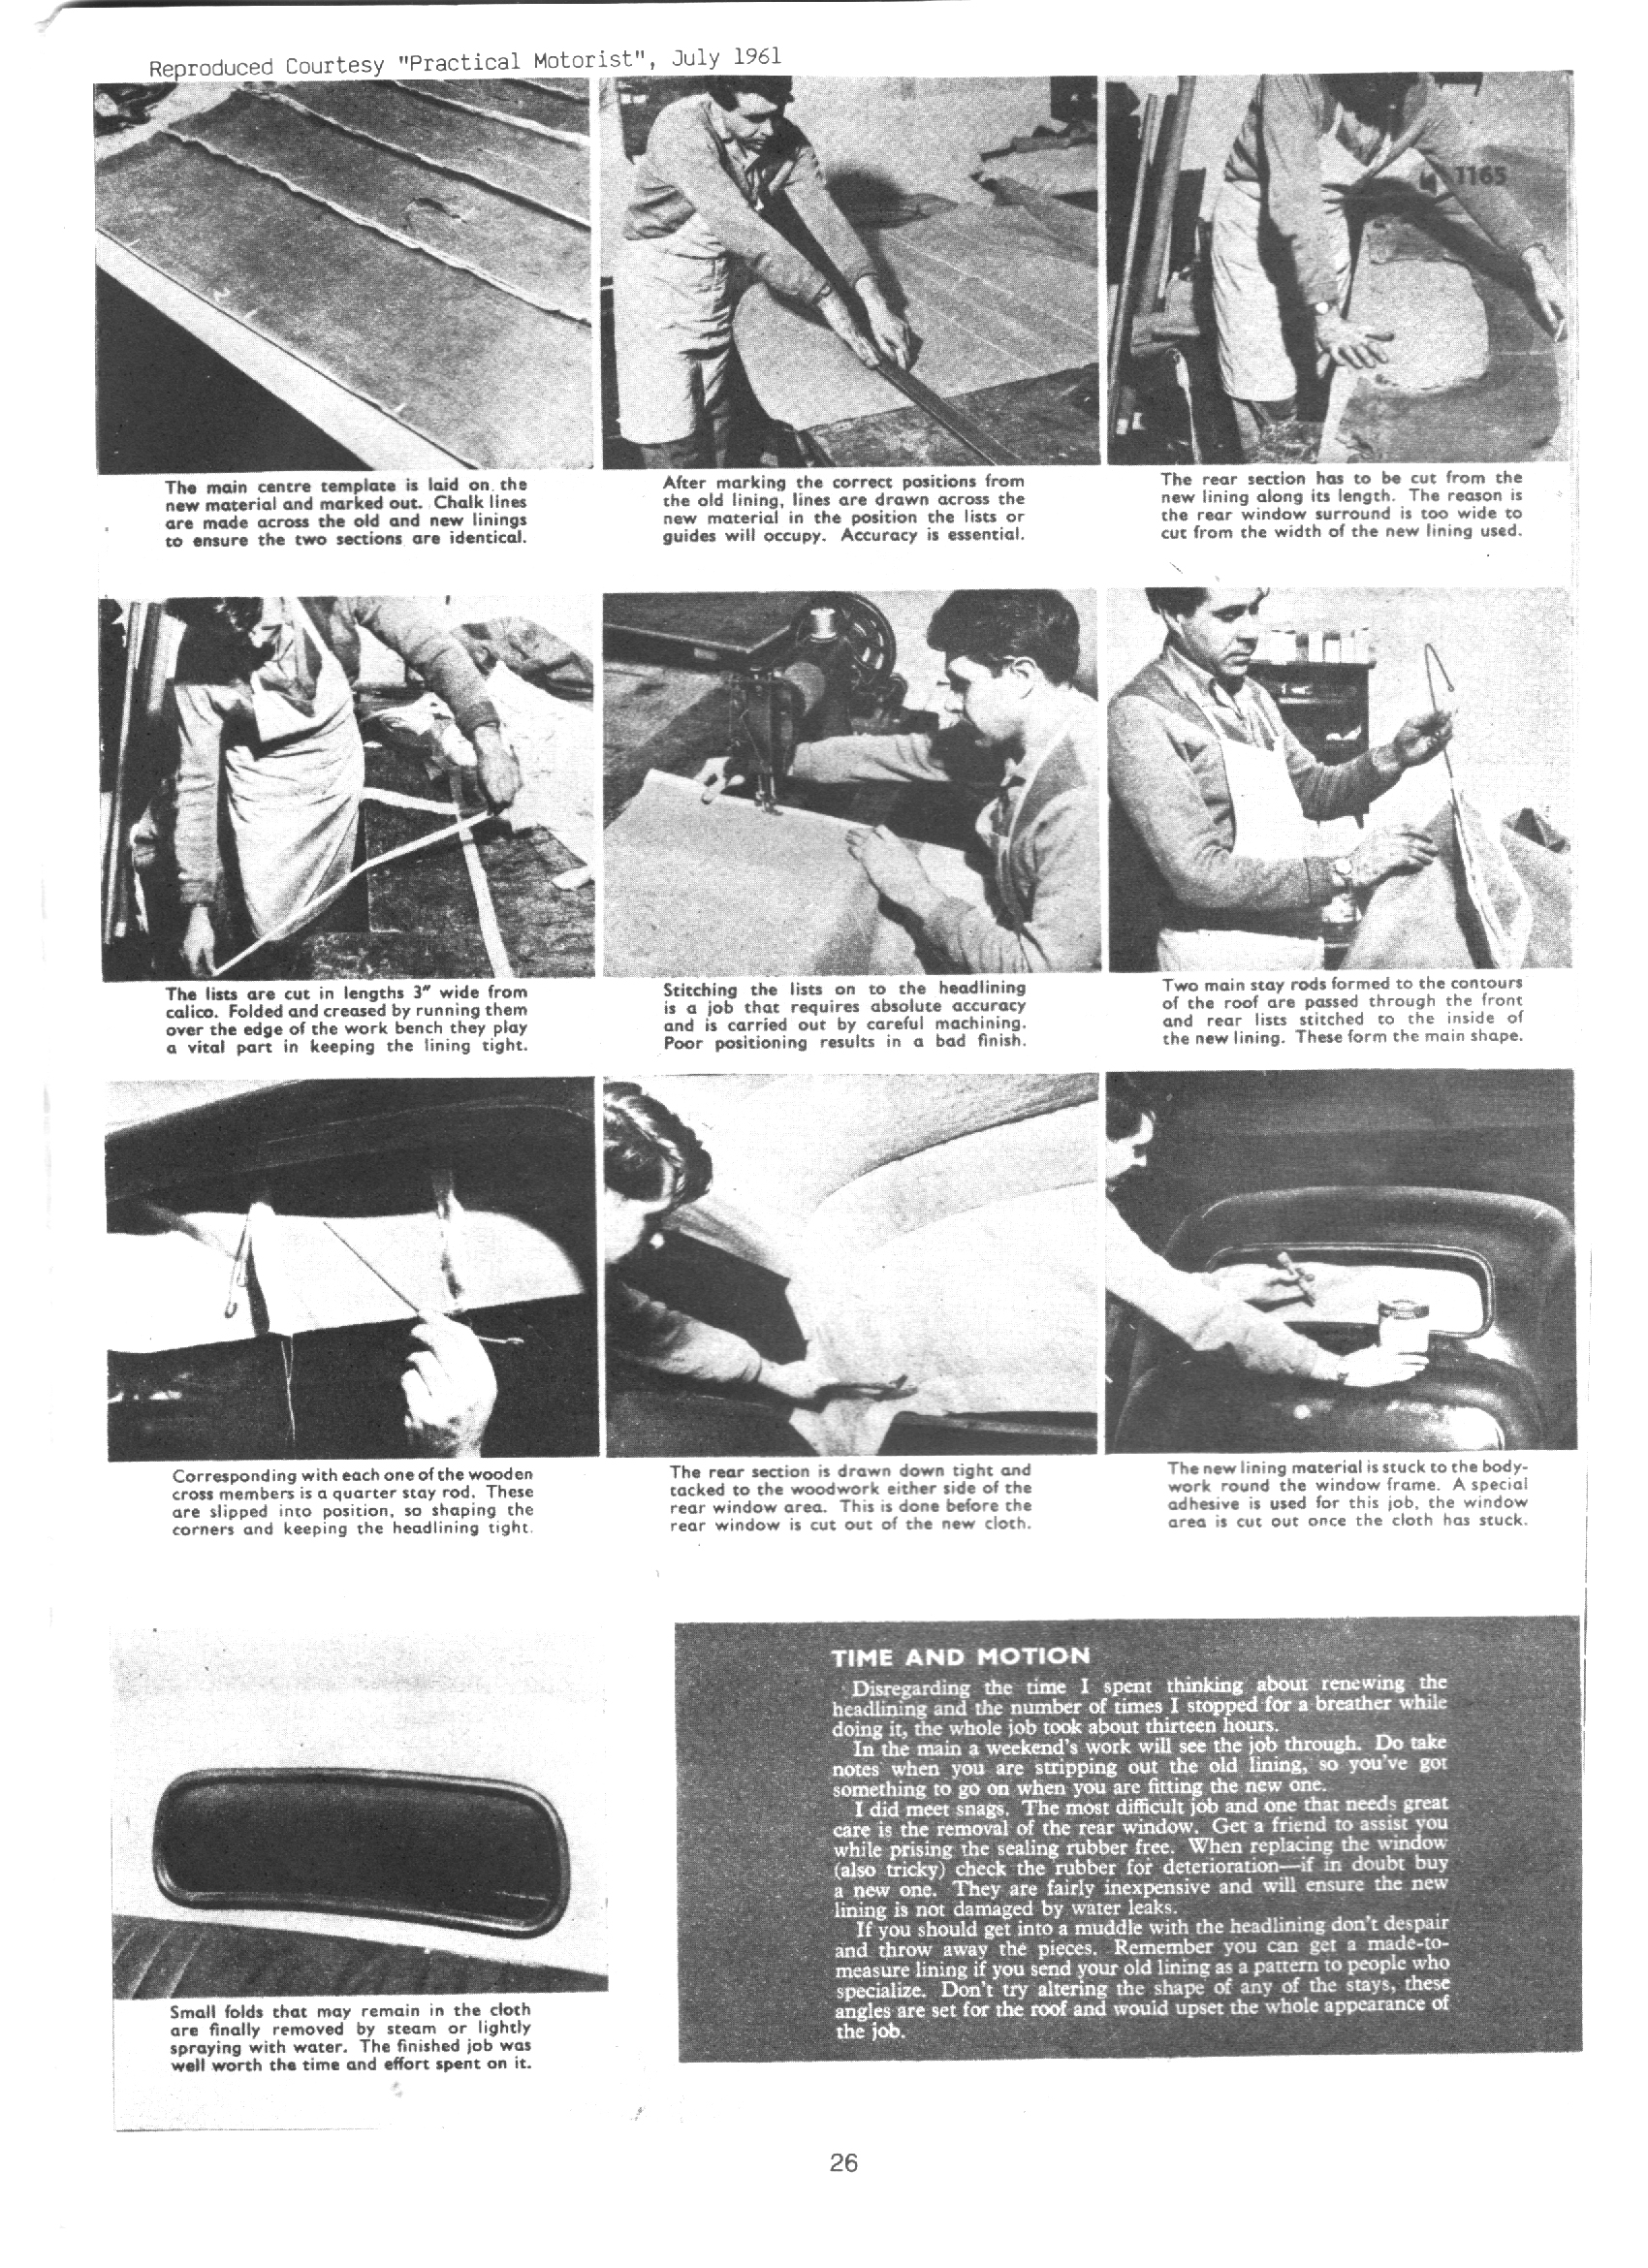
REPRODUCTION FROM US ARTICLE: `Installation is simple and easy. For perfect installation please follow the ten steps listed below. Thousands of these especially designed Headliners have been installed and are rendering complete satisfaction. 1. Remove dome light, sun visors and garnish moldings from windshield and quarter glass. 1-a. Necessary on Ford products only - 1941-1964 models: Rear window is carefully removed, prying molding with a brake adjustment spoon or a broad blade screwdriver. While this is not difficult, if you are not too certain of your ability to do this safely,, turn this part of the job over to a glazier. 2. Remove back seats and the cardboard cover on package tray. Also remove side panels if windlace is to be replaced. 3. Old Headliner has been cemented or tacked along front and back of car. Pull Headlining free at these points. Above doors Headliner has been pushed up behind metal "retainer strips," teeth on which hold Headliner in place. Tear Headliner free from retainer strips on each side of car. Headliner hangs from bows which slide thought cloth loops sewed to back side of Headliner, the ends of which bows are now exposed. Working from front to tack of car, remove screws from ends of bows, which screws join bows to side of car. Headliner is now free. Remove from car. 4. Remove screws which fasten retainer strips to body above doors. Windlace is now exposed. If windlace is to be replaced, remove old windlace, removing tacks holding this in and tack in new windlace. Clean out behind retainer strips, straightening any bent teeth in same and remount, screwing retainer strips firmly into place. 5. Remove bows from old Headliner and slide into loops in new Headliners in same order in which they are found in old Headliner. One inch of bow should be visible extending from each end of loop. If necessary, clip loop back equally on both ends until 1" of bow is visible on both ends. 6. Working from back to front of car, fasten bows with new Headliner back into car. 7. Cement or tack Headliner in center-front and center-rear of car. Center of Headliner may be marked with a chalk line on back side of Headliner. 8. Trim excess material over door, slowing two inches on each side. Push up under retainer strips. Using dull putty knife, or ordinary table knife, push small amount of material under retainer strip at center-sides of car. 9. Working alternately from centers toward corners, fasten Headliner into place at all points by continuing to push under retainer strips on sides and tack or cement at front and back of car. 10. Cut out for back glass and cement or tack Headliner around edges of glass frames. Trim off excess material around all edges, replace sun visors, dome light, garnish moldings, and rear seats. Job is completed. NOTE: Headliners improve with age and if left alone will soon shrink into place of their own accord. If they are good at first, they will be perfect later. However, removal of any wrinkles left in cloth headliners may be speeded up by spraying or sprinkling plain warm water on the headliner at points where wrinkles appear. Moisture and low heat will hasten the departure of wrinkles on leatherette headliners.
|
| Click here to return to main pages |